Manual modules
When you see it
Available in every POSYMA to whoever has permission over Users & Roles. How many people can sign in depends on your POSYMA.
Guide 1 of 4How to invite a team member
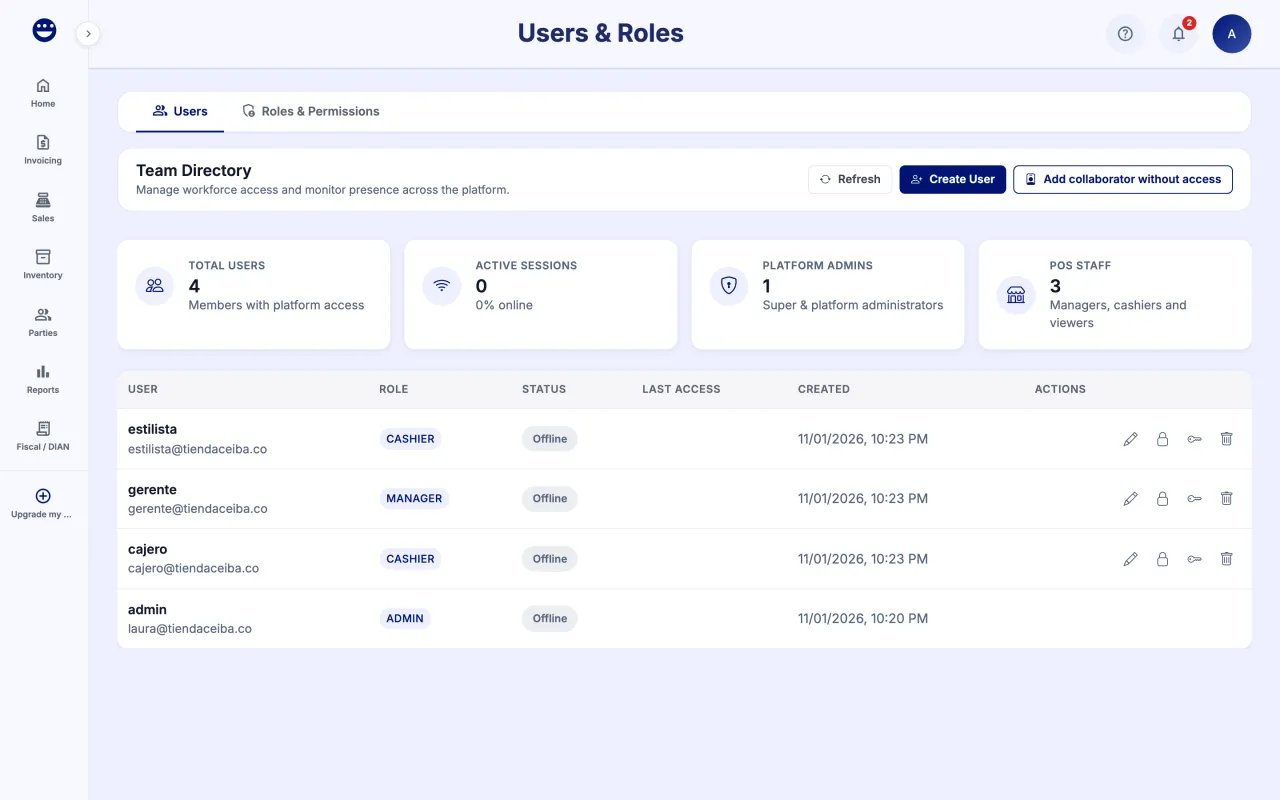
- Open Users & Roles, "Users" tab, and click "Create User".
- In "Invite New User" type the first name, last name, username and email.
- Pick the "Role": "POS Admin" (administrator), "Manager", "Cashier" or "Viewer" (read only).
- The "Landing page" follows their role. Change it only if you want another screen to open.
- Click "Create User". POSYMA confirms "Invitation sent" and the person receives an activation link to set their password. Until they activate their account, the list shows them as "Pending activation"; if the email did not arrive, use "Resend invitation" on their row.
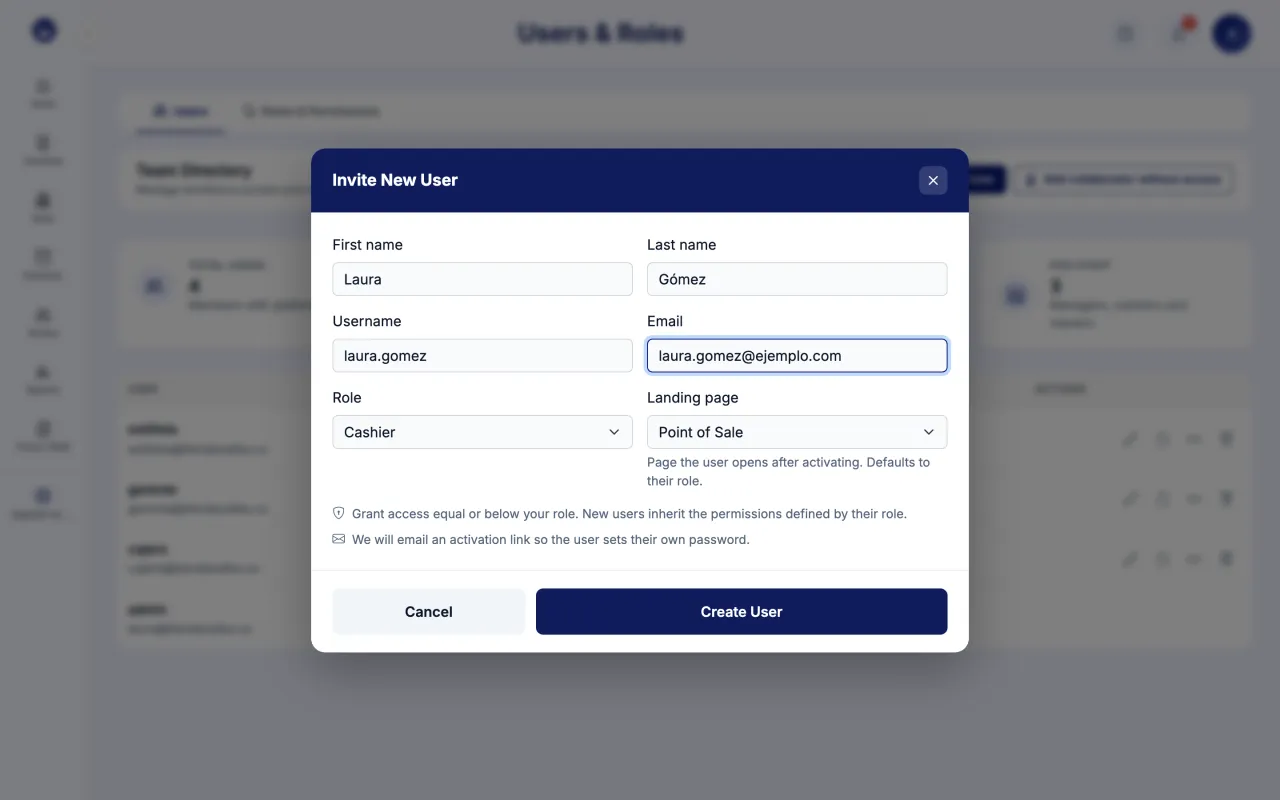
Grant access equal to or lower than yours. Each person inherits the permissions of their role.
Guide 2 of 4How to add a collaborator who does not sign in
- On the "Users" tab, click "Add collaborator without access".
- Type the name and, if you want, the phone, and pick their "Role".
- Click "Add collaborator". No email is sent, but the collaborator uses one of your plan's user seats.
- If they need to sign in later, use "Give access" on their row, type their email and click "Send invitation". Their schedule and sales are kept.
Use it for people who work with you but do not use the system, such as the team that serves the appointments at your salon.
Guide 3 of 4How to edit, deactivate or reset a user
- Find the person in the list.
- Use "Edit" to change their "First name", "Last name" or "Role" and save with "Save changes".
- Use the lock ("Deactivate") to block their access without deleting them; the same lock ("Reactivate") restores it.
- Use "Send password reset" if they forgot theirs.
Guide 4 of 4How to create a custom role
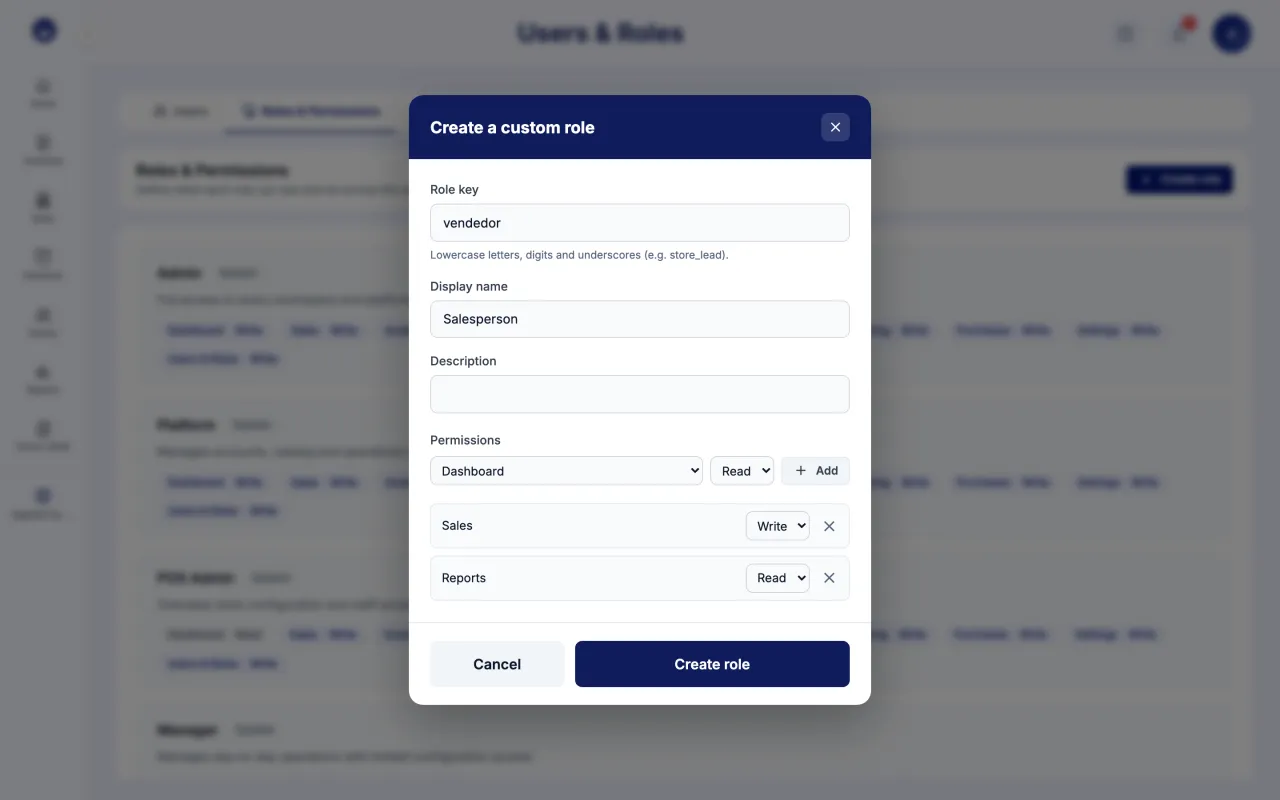
- Open the "Roles & Permissions" tab and click "Create role".
- Type the "Role key" (lowercase with no spaces, for example store_lead), the "Display name" and the "Description".
- Pick the "Base role": Cashier, Manager or POS Admin. It is the level the role starts from.
- Under "Permissions", pick a module and click "Add". For each module choose "Read" or "Write".
- Click "Create role".
- Assign the role to people from the "Users" tab with "Edit".
System roles cannot be edited. If you need something different, create a custom one. To delete a role, reassign its users first.
Frequently asked questions
What is the difference between Read and Write?
With Read the person sees the module but cannot create or change anything. With Write they can create, edit and delete. Without permission, the module does not even show in their menu.
The person did not get the invitation
Ask them to check their spam folder. If it is not there either, use "Resend invitation" on their row.