Manual modules
Guide 1 of 5How to create a product
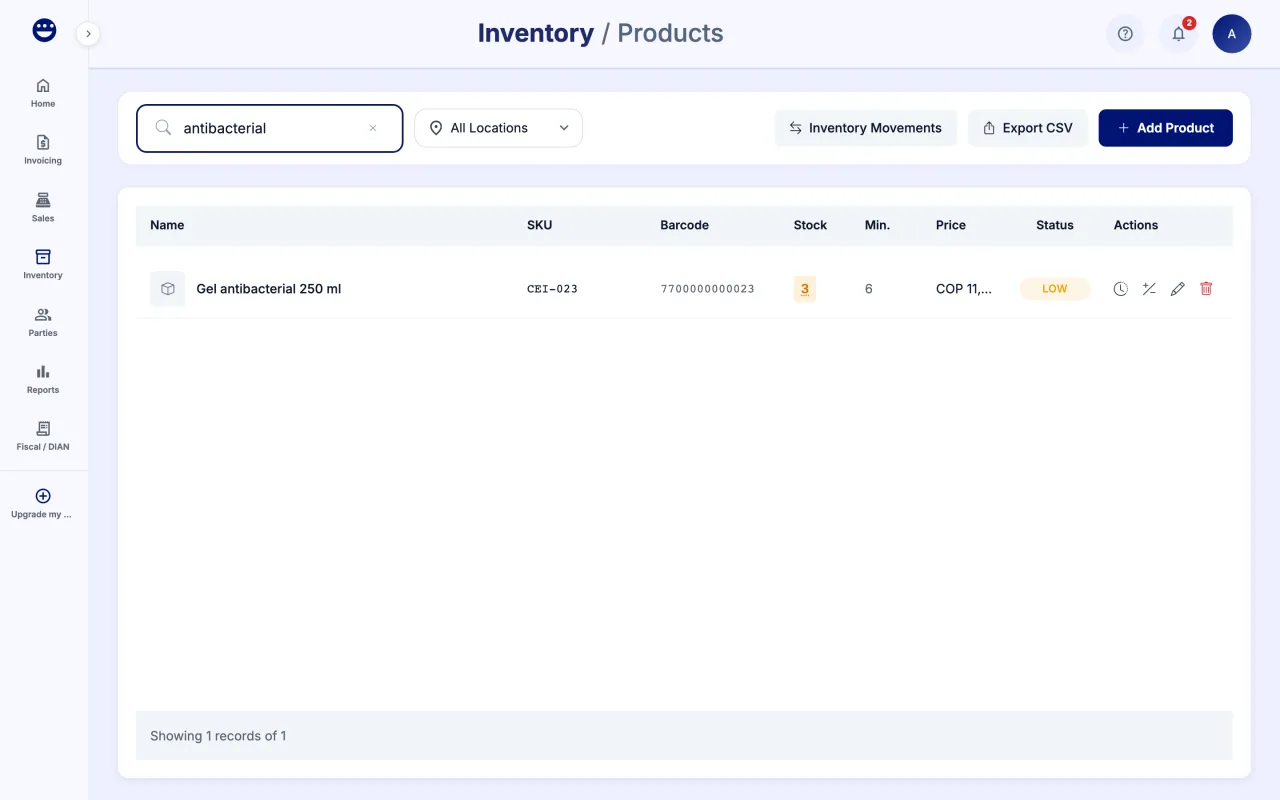
- Open Inventory > Products and click "Add Product".
- Type the "Name" and the "Sale Price". The "SKU" is generated if you leave it empty.
- Fill in what you need: "Purchase Cost", "Barcode", "Brand", "Category", "Supplier" and "Unit of Measure".
- Choose the tax: "None", "IVA 5%", "IVA 19%", "IVA excluded" or "IVA exempt".
- Type the "Opening Stock" if you already have units and the "Minimum Stock" to get low-stock alerts.
- Click "Create Product". You can add the image afterwards.
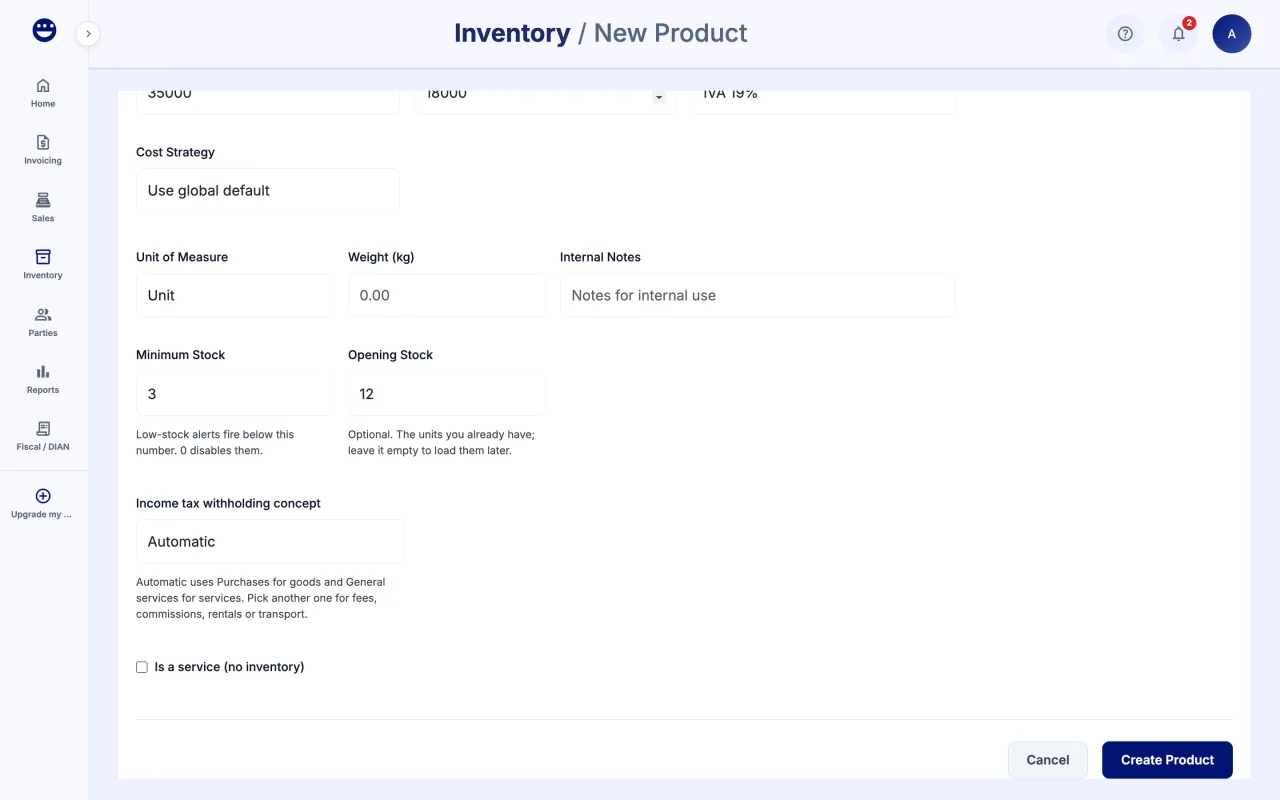
If it is a service, tick "Is a service (no inventory)". Services carry no stock. If your business is not responsible for IVA, POSYMA does not charge IVA on your products.
Guide 2 of 5How to adjust stock
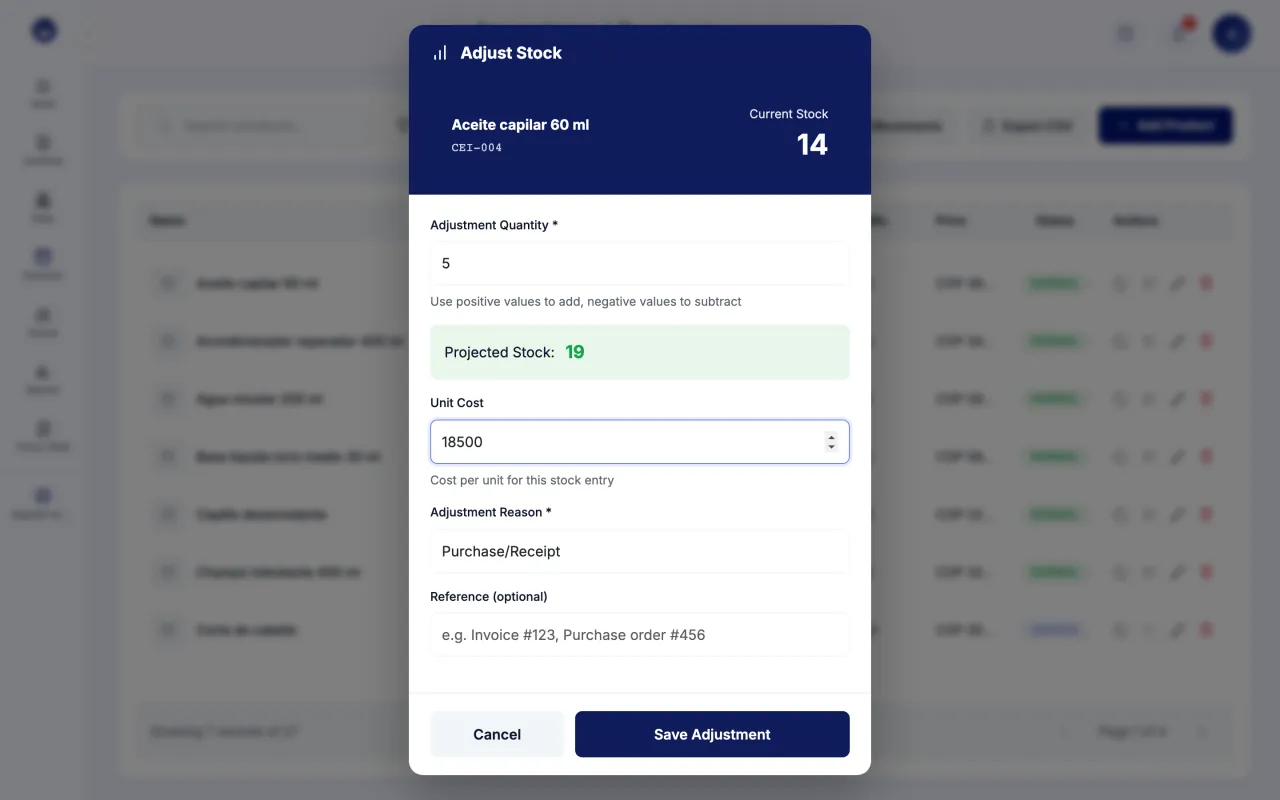
- In the product list, click the row's adjust button ("Adjust Stock").
- In "Adjustment Quantity" type a positive number to add or a negative one to subtract.
- Pick the "Adjustment Reason": purchase, physical count, customer return, damaged, expired, transfer or other.
- For an entry, type the "Unit Cost". Check the "Projected Stock:".
- Click "Save Adjustment".
Guide 3 of 5How to view and transfer stock between locations
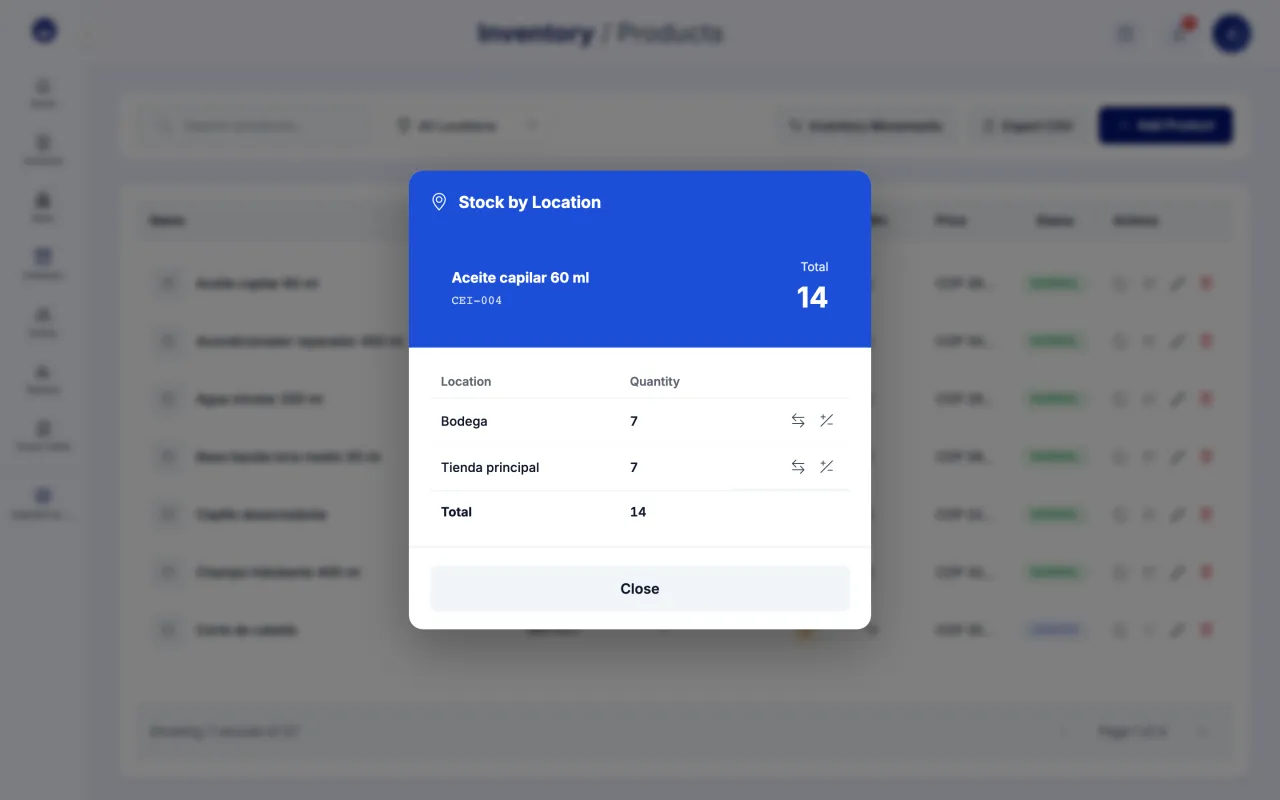
- Click a product's stock number to see how much is at each location.
- At the source location, click "Transfer stock from this location".
- Pick "To Location", type the "Quantity" and notes if you want.
- Click "Transfer".
The list's location filter shows stock for a single location. "Movements" lists every entry and exit with filters such as "Last 7 days".
Guide 4 of 5How to create categories and locations
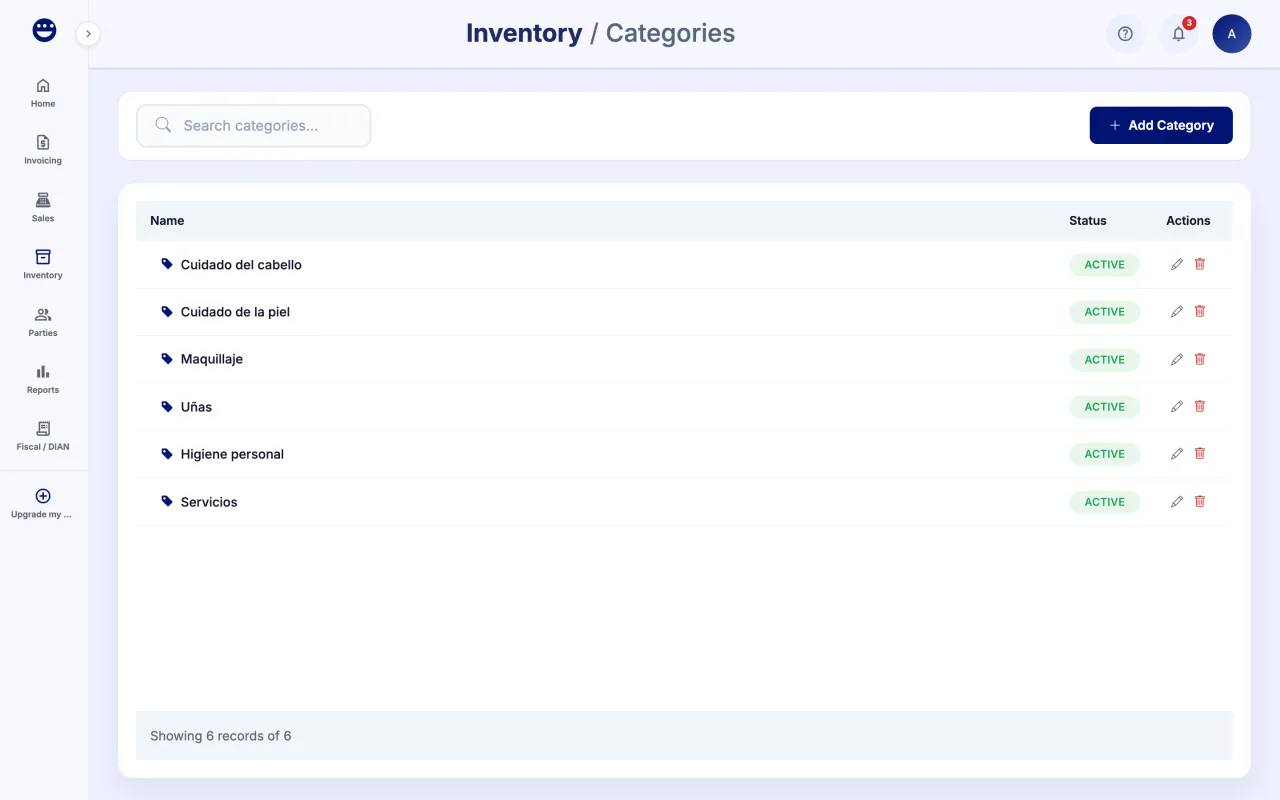
- Open Inventory > Categories and click "Add Category".
- Type the "Name" and, for a subcategory, pick the "Parent Category". Click "Create Category".
- Open Inventory > Locations and click "Add Location".
- Type the "Name" and "Code", pick the "Type" (Warehouse, Zone, Shelf or Bin) and, if needed, the "Parent" location.
- Click "Create Location".
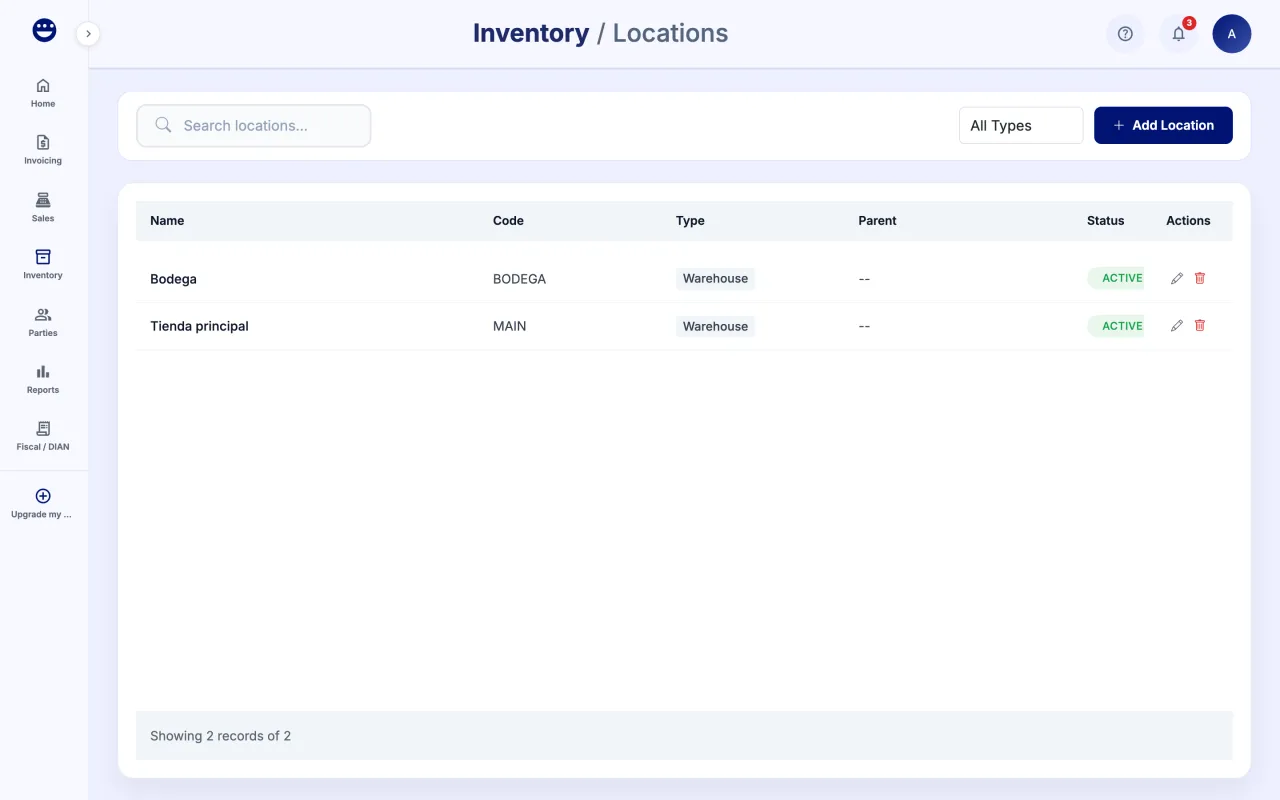
If you delete a category, its products become uncategorized. If you delete a location, its child locations become root locations.
Guide 5 of 5How to create a price list
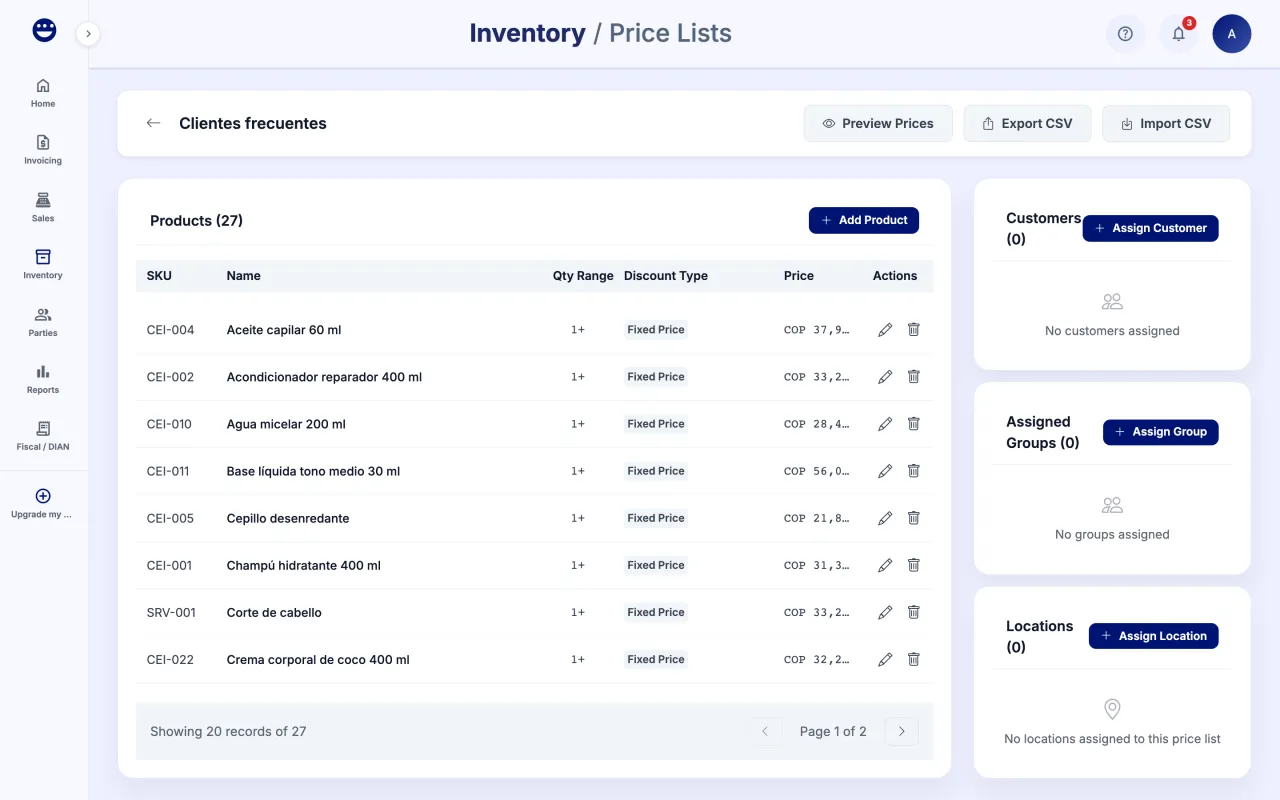
- Open Inventory > Price Lists and click "Add Price List".
- Type the "Name", tick "Available in POS" if you will use it when selling and, if you want, set a "Start Date" and "End Date". Click "Create Price List".
- Open the list and click "Add Product". Pick the "Discount Type": "Fixed Price", "Percentage" or "Formula".
- For percentage, a negative number is a discount and a positive one a markup (for example -15 is 15% off). You can set quantity ranges.
- Assign the list with "Assign Customer", "Assign Group" or "Assign Location".
Use "Import CSV" and "Download Template" to load many prices at once.
Frequently asked questions
How do I export my products?
In Inventory > Products, click "Export CSV".
What do the Normal, Low and Out labels mean?
"Low" shows when stock drops below the product's "Minimum Stock"; "Out" when no units are left. Set the minimum stock to 0 to turn off alerts.
Can I bring my products from Excel?
Yes, with the "Bring my data" assistant in the account menu. See the Import data page.