Manual modules
Guide 1 of 4How to create your business account
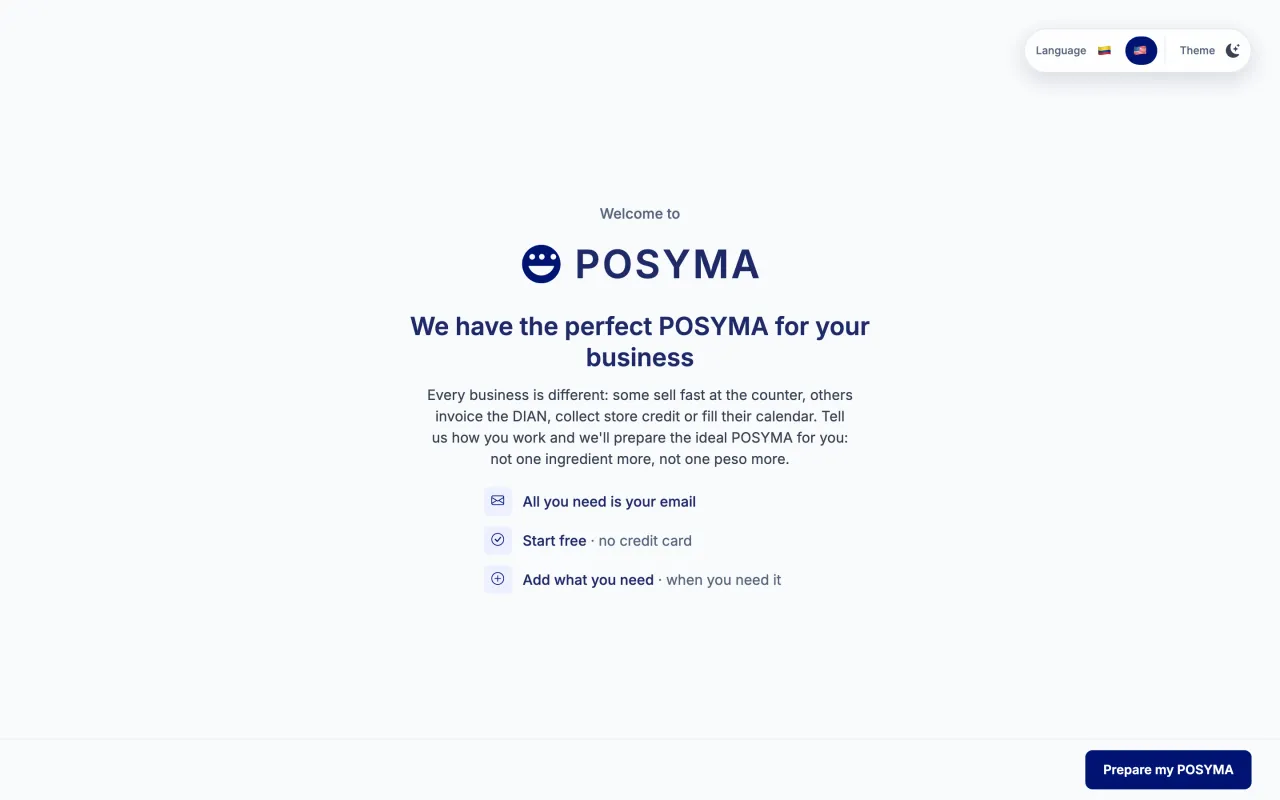
- Open the POSYMA sign-up page and click "Prepare my POSYMA".
- Fill in "Business name", "Email" and "Password", then click "Create account". You can also use "Continue with Google".
- Check your email for a 6-digit code. Type it in "Verification code" and click "Confirm".
- Under "What does your business need?" pick the option that looks most like your day, or a ready-made POSYMA. Then fine-tune each ingredient: point of sale, electronic invoicing, extras, team and locations, reports and support.
- Choose your workspace address from the suggestions or type your own under "Or type your own". Your team signs in at that address.
- If your POSYMA has paid ingredients, review the "Your POSYMA" summary and pay with Wompi in the tab that opens. Keep the POSYMA page open meanwhile.
- POSYMA creates your workspace and signs you in as soon as it is ready.
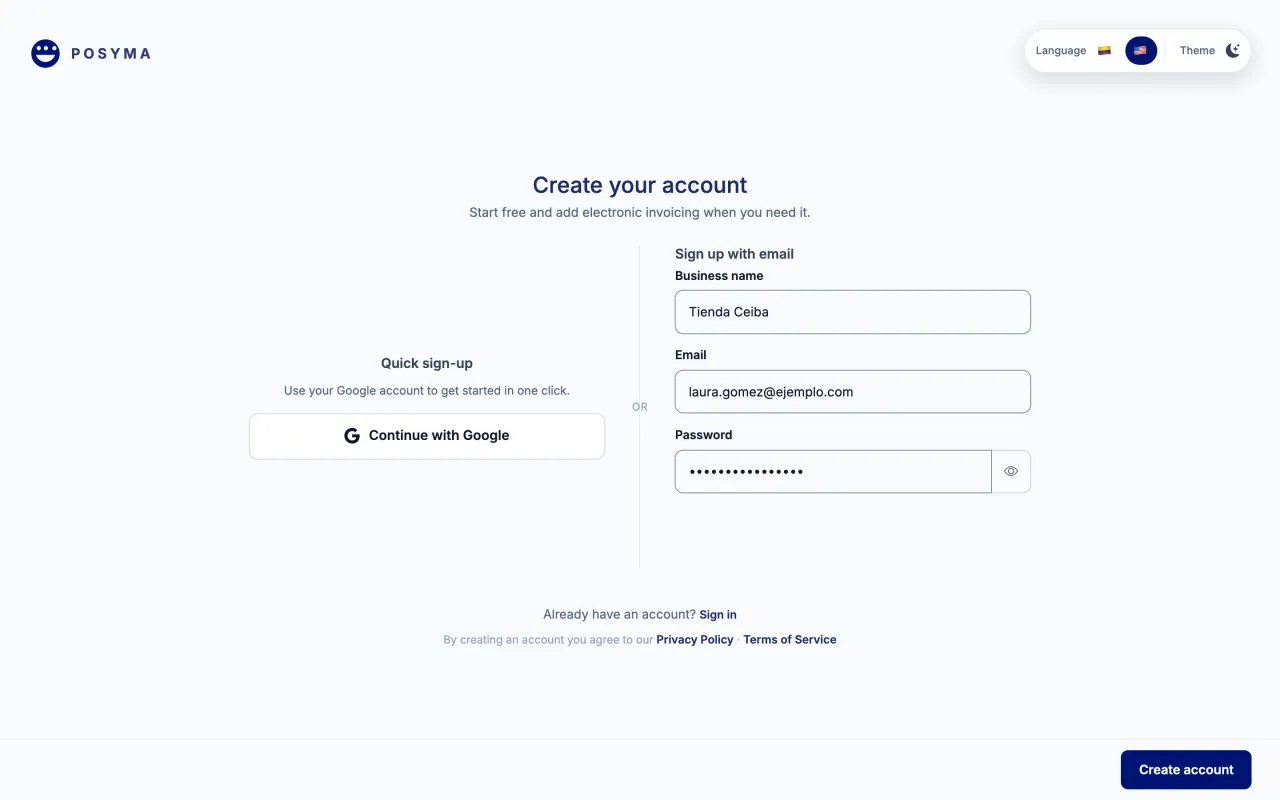
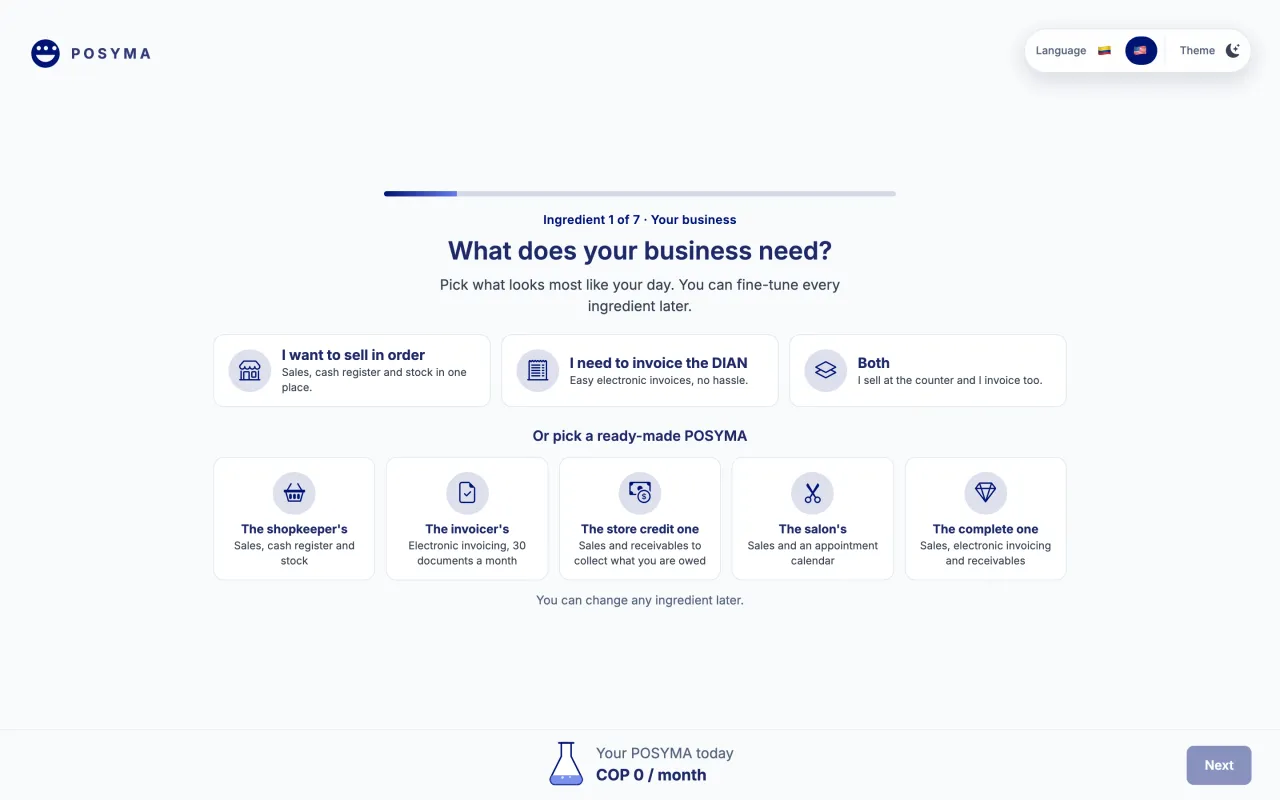
All you need to start is your email, no credit card. If the code does not arrive, check your spam folder.
Guide 2 of 4How to activate your POSYMA with your RUT
- On Home, find the "Activate your account" notice and click "Activate now".
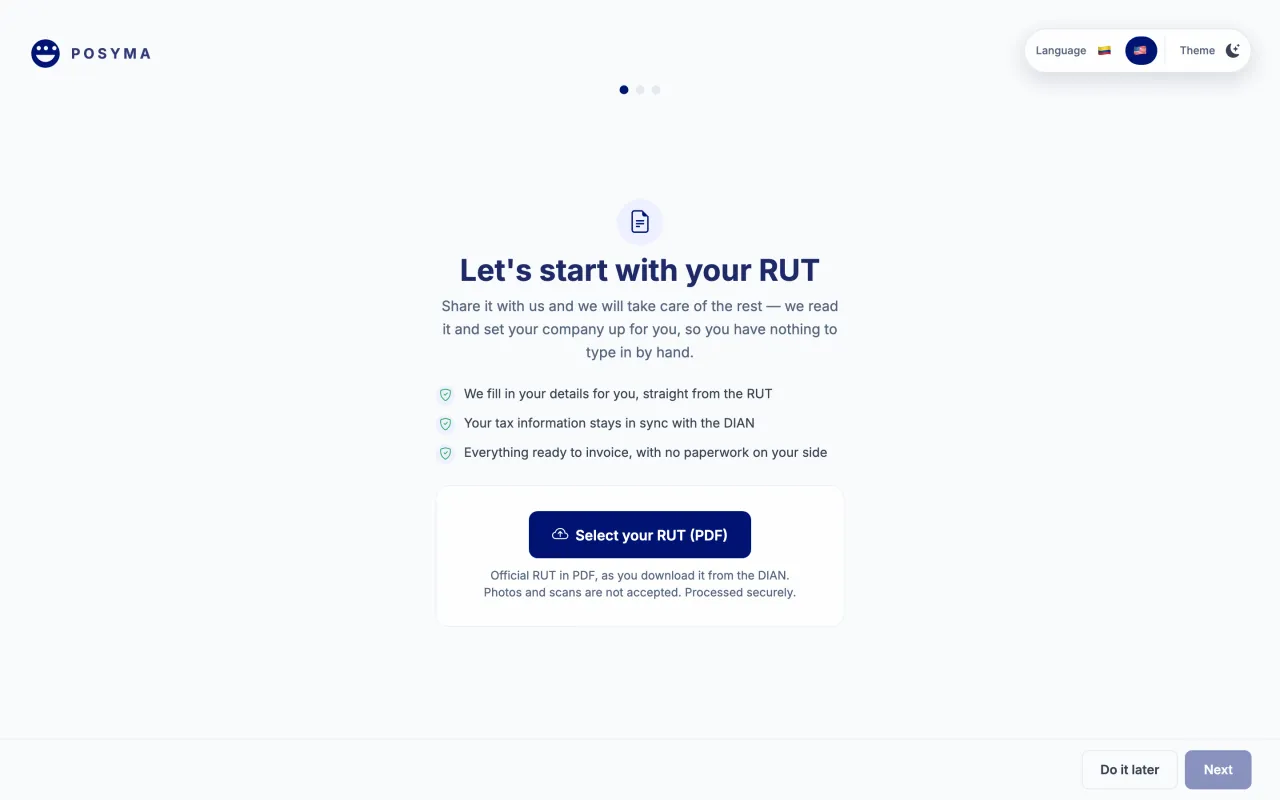
- In "Let's start with your RUT", click "Select your RUT (PDF)" and choose the RUT you downloaded from the DIAN website.
- Check the "Confirm your company details" screen: NIT, name or business name, city, phone and whether you must invoice electronically. If the details are not yours, click "This is not my information".
- Under "Supporting documents", use "Upload PDF" for the legal representative's ID. If your business is a company, also upload the Cámara de Comercio certificate (no older than 90 days). Then click "Next".
- If your RUT says you must invoice electronically, POSYMA offers to add invoicing: choose "Add invoicing" or "Not now".
- When you finish, click "Go to the dashboard". On any step you can use "Do it later" and come back from the same notice.
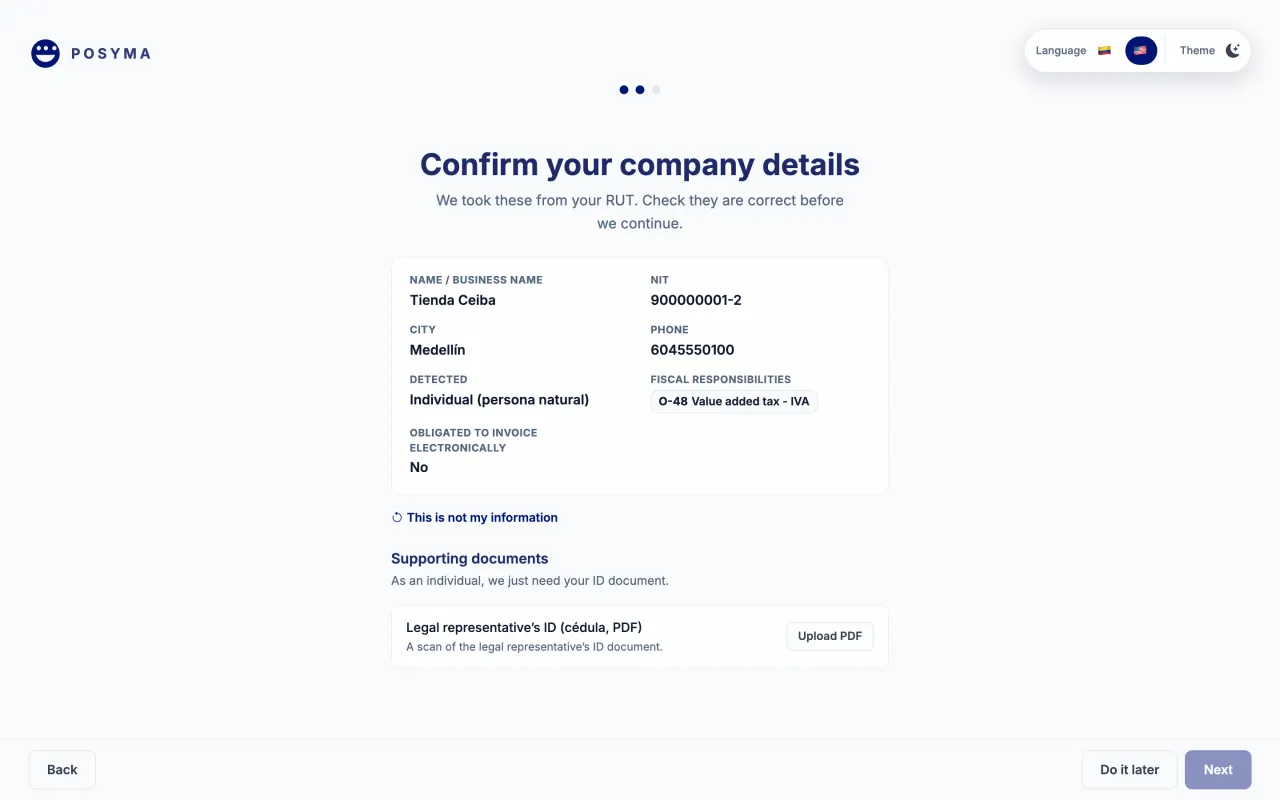
The RUT and the Cámara de Comercio certificate must be the original PDF you download from the DIAN and the Cámara. Photos and scans are not accepted. The ID can be a scan.
Guide 3 of 4How to link your invoicing resolution
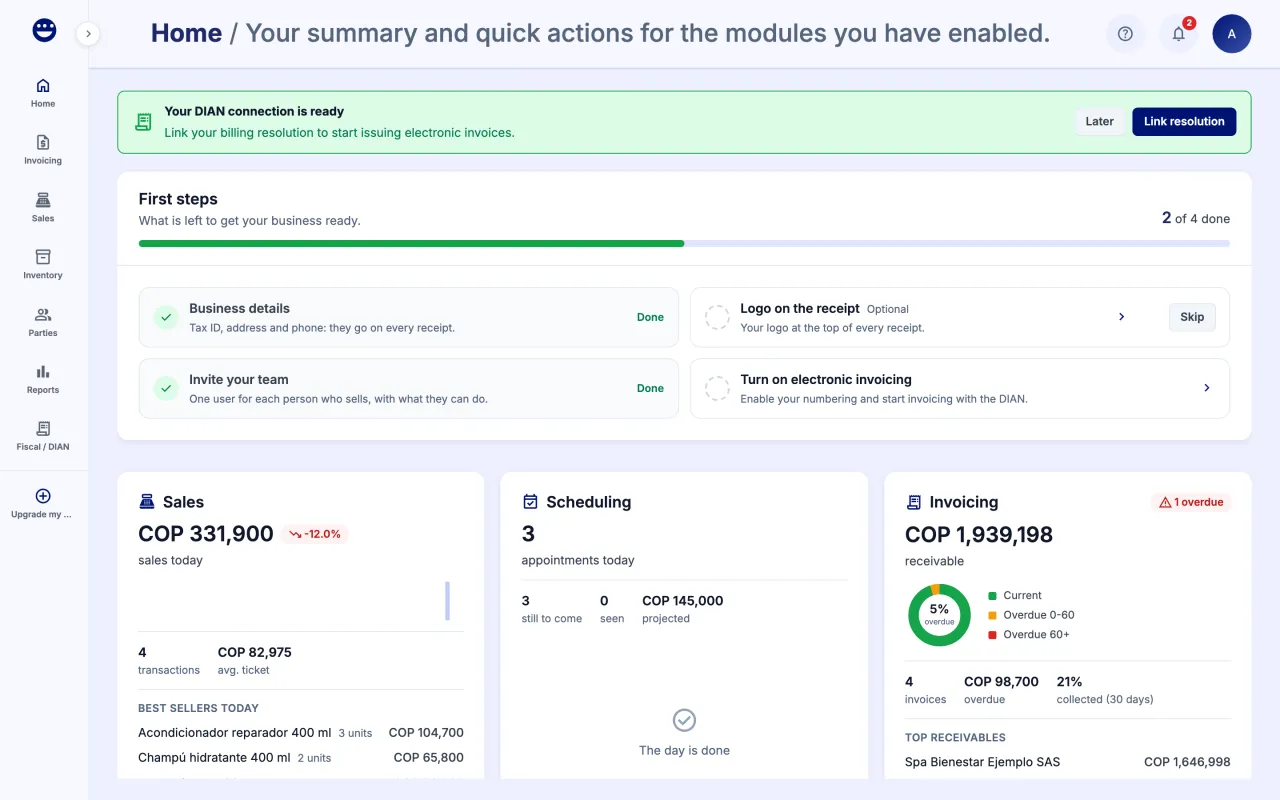
- When your DIAN connection is ready, Home shows the "Your DIAN connection is ready" card.
- Click "Link resolution".
- Upload the PDF of the resolution the DIAN gave you and follow the guide to authorize it on the DIAN production portal.
- When linking finishes, confirm which document each prefix numbers with "Confirm prefixes".
- This same step also sets up the numbering of your credit and debit notes.
While linking is in progress you will see "Resolution linking in progress" with a "View progress" button. If an attempt does not finish, use "Retry linking".
Guide 4 of 4How to take your first steps with Mia
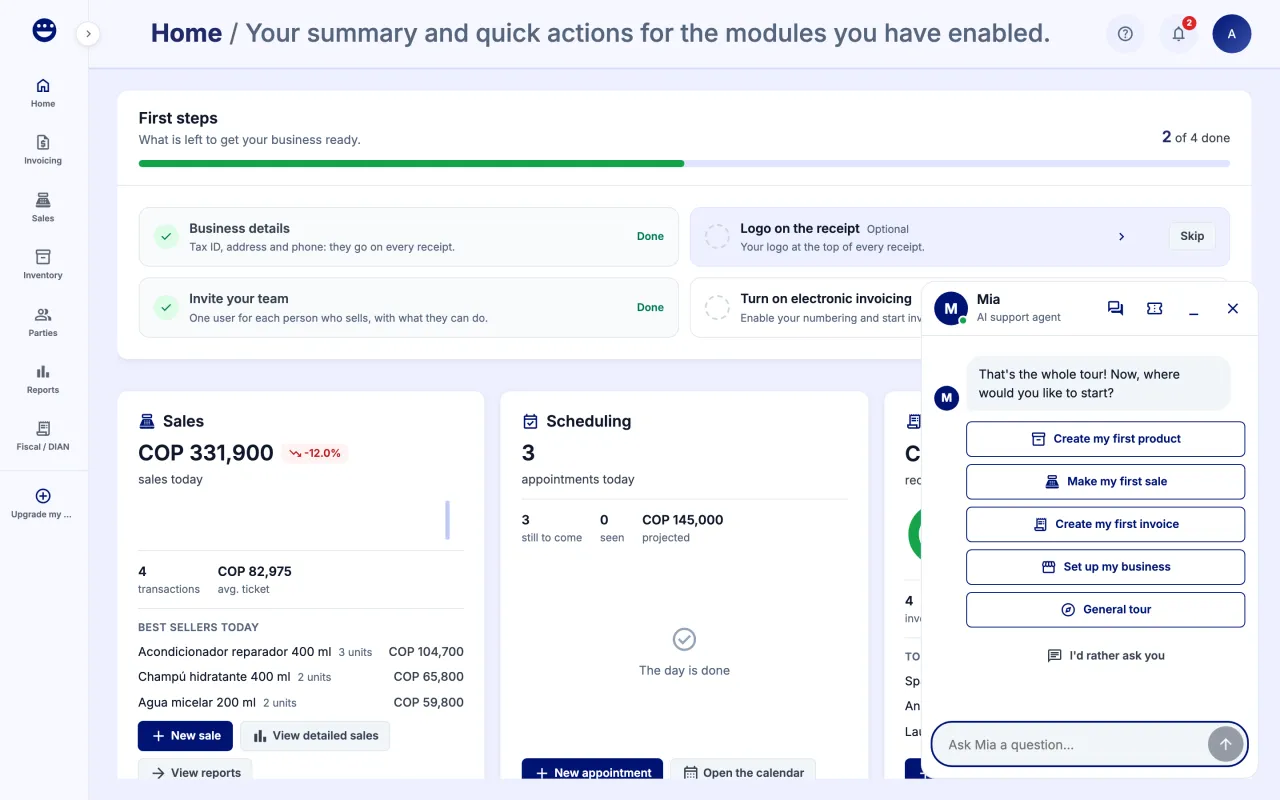
- The first time you sign in, Mia greets you and asks what you want to do first.
- Pick an option: "Create my first product", "Make my first sale", "Create my first invoice", "Set up my business" or "General tour".
- Mia walks you through the real screen step by step and tells you what to type in each field. At the top you see which step you are on, for example "Step 2 of 7".
- If you would rather ask a question, choose "I'd rather ask you" and type it.
- When each walkthrough ends, Mia suggests the next step.
Frequently asked questions
Do I have to pay to start?
No. Start free with point of sale, cash register and inventory. You only pay for the ingredients you add, such as electronic invoicing or scheduling.
Why is my RUT not accepted?
POSYMA reads the RUT straight from the PDF the DIAN generates. If you upload a photo or a scan, it asks for the original file. Download it again from the DIAN website and upload it as is.
Can I activate the account later?
Yes. Use "Do it later" and come back any time from the "Activate your account" notice on Home. You need an active account to sell and invoice.
Who can activate the account?
Only the owner or an administrator. If someone else tries, POSYMA asks them to request it from whoever manages the account.